Friday, 18 March 2016

Production Assessment 2 - Making a cocktail

After getting feedback from my assessment 1, we were then given our criteria for assessment 2. This again I had to film a process so I had to decide what I wanted to film. Seeing as recently I had been learning some simple cocktails I thought it would be perfect to film this. The process is easy to film, if I was able to get someone to help me and act in it.


After deciding what I want to film then proceeded to research possible cocktails I could film. As one of the most well-known aspects of cocktails is the shaker I wanted to have a cocktail. That used a shaker and from my research I chose a lemon drop martini. After deciding what cocktail to make I then had to create a shot list for the clip.  


Once I had filmed the process I then had to edit it. Even though we didn’t have to incorporate sound I still wanted to, so I had to find suitable music that would fit the film. As it was a rather short film it didn’t take me too long as I trimmed up my rough edit. Overall I was very happy with the final project I produced and believe it to be a high standard of my work. 

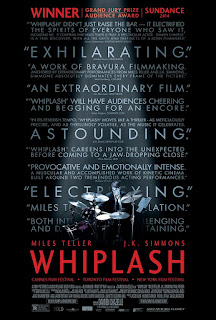
Whiplash

Fortunately it just so happened I have been trying to learn the drums recently and noticed a new film called ‘Whiplash’. Within the first 2 minutes I was blown away with the editing and cinematography of the film.

The plot of the film is a young and talented drummer attending a prestigious music academy finds himself under the wing of the most respected professor at the school, one who does not hold back on abuse towards his students. The two form an odd relationship as the student wants to achieve greatness, and the professor pushes him. - Written by andrewhodkinson.

I found out after that the film won an Oscar for Best Achievement in Film Editing. I wasn’t surprised as everything about what I had learnt in post-production, the film did really well. The pace of the film is exactly my idea of great pace and the film drew me in the whole time.


One of my favorite parts of the film is were Andrew (the main character) is practicing by himself. Before he starts he gets ha large jug of ice water and stets it to the side of him. As he is playing you see slowly his hands become bloody and he uses the jug to dip his hand in. You really get the sense of determination and struggle that he is facing and you become immersed in the fast paced but slow-motion scene.


Overall I would 100% recommend watching the film and really look at the editing style and how it complements the cinematic style of the whole film. 

Production Assessment 1 - Making a cup of tea

For the production module we were set an assessment that we had to film a process. It had to be less than 90 seconds and it had to make sense.  The main point for this assessment was to practice our composition in our shots, but we were also marked on our editing as the clip had to run with a good pace. 

My assessment 1 ttps://www.youtube.com/watch?v=32wJpJNqto8


Notes taken from the lecture are as follows;

Making a cup of tea

Making a montage is all about the close ins – think action and re-action!

What props are needed?

Mug, tea bag, milk, spoon, bin, table, kettle, person to make the tea.

Film the following from an observational POV. Therefore, watching the actor collect the props from their set locations and performing the process.

Establish space and location – what space do you have?     Suggest the process should take place on a table in the middle of the room to allow the camera to be positioned.  Allows more room around the subject so you can shoot from front, back, sides, angular shots. 

  1. Pick up kettle, carry it to sink and fill it up with water.
  2. Place it back on its base and turn it on
  3. Get a cup from the cupboard and put it on the table.
  4. Collect a tea bag from the pot.
  5. Put bag in cup
  6. Get milk from fridge . Do not pour any in yet.
  7. Get a spoon from the drawer
  8. Pick up sugar and position it close to the mug. 
  9. When the kettle has boiled pour the water into the cup.
  10. Put kettle down
  11. Stir the tea bag in the cup
  12. Let it brew. Watch the steam and the water swirling around
  13. Remove the tea bag and put it in the bin.
  14. Pour in milk
  15. Add sugar
  16. Stir
  17. Put Milk away
  18. Finished!


Overall my experience in filming and editing the assessment was good. Due to the fact I was by myself I found it hard to set up shots as I couldn’t see what the shot looked like. In terms of editing I really enjoyed it, also to note we didn’t have to focus on sound. I really worked on pace of the edit, but like I mentioned before I wasn’t always happy with the shot I had taken. As I had learnt I first did a rough edit to get an idea of how long the film will be and how it would run.  For the next assessment I will work on lighting, getting an friend to act and cutting down the clip. 

Audio Effects in Avid

In this week’s tutorial we learnt about adding audio effects to edits. We were first told to download video and audio clips from blackboard. The video was a clip from the film Delicatessen, which I had never seen before. 

With the sound effects and video we were told that by the end we had to create a clip that has sound and makes sense. The first thing I did was watch the clip in full. In doing so it was pointed out that a part of the clip, the camera goes through a small pipe. This meaning we would have to add a reverb effect to any sounds that were happening.  From the notes I have taken the instruction to use the audio mix was as follows;


Adjust audio in bin
  • Right click in bin > apply gain > ‘type value for adjustment’


Using the Audio Mixer
  1. If you select Window > workspace > Audio editing, the audio mixer will be brought up as standard but you can also choose the audio mixer from the tools menu.
  2. Selecting‘s’ – solo or ‘m’ – mute, in the audio mixer will also correlate this to the timeline.
  3. You can select the number of tracks you are viewing and the ‘groups of 4’ that you want to work on.
  4. Select and drag left or right to pan (if you try to move cursor around the wheel this won’t work)
  5. Join tracks together to adjust them all at the same time with the ‘group’ button


What makes a good action scene

After looking at the other Low Budget tips video that the YouTube channel samandniko put out I subscribed to them in the hope that they would put out more similar helpful tips. Fortunately they did and this one talks about what makes a good action scene.


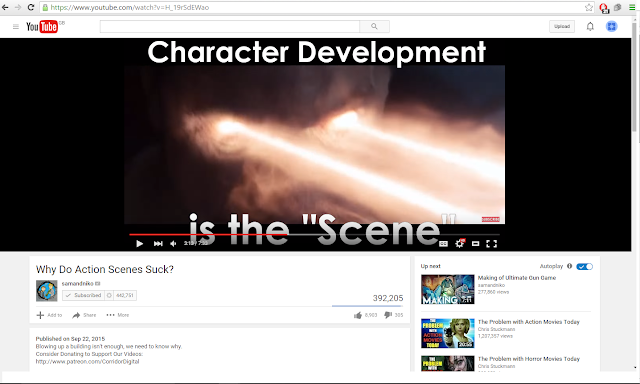
 Why do action scenes suck? - By samandniko

The video talks about different examples of action scenes that work and ones that don't and most importantly explains why they do or don't work. The main point I will take from the video is that good action sequences are there for a reason. the character in them have to be built up first so that the audience feel something for them whether it be anger towards them or they like them and want them to live. Also you need to show the full action, and possibly reaction in the same shot. Quick short cuts are used because they are cheap and easy to do, but it is better if you show wide shots of the whole sequence coming together.


Overall I will remember the advice given to me in this video if I ever do an action sequence in the future, this could be if I’m producing or editing. If I was editing a fight sequence I would try to add longer shots that showed the audience what is happening. 

Juxtaposition

Today in the lecture we learnt about Juxtaposition. The definition of Juxtaposition is;

‘In a film, the contiguous positioning of either two images, characters, objects, or two scenes in sequence, in order to compare and contrast them, or establish a relationship between them; see also sequence, symmetry, and composition.’

From what was discussed in class and what I have seen on films and T.V. shows, the use of juxtaposition is quite heavy and very impactful. Some good examples of juxtaposition are;

The Baptism Scene from ‘The Godfatherhttps://www.youtube.com/watch?v=EfbYp9oaIT8


A very similar scene in ‘Breaking Bad’ https://www.youtube.com/watch?v=NYcOl33-mI0


Both of the clips above have a very strong use of sound.  For example in ‘The Godfather’ as the action build up so does the organ in the background. In Breaking Bad the music adds adds to the juxtaposition as it is happy uplifting music and the pictures show are of brutal prison murders.

Lev Kuleshov, a Soviet filmmaker, was among the first to dissect the effects of juxtaposition. Through his experiments and research, Kuleshov discovered that depending on how shots are assembled the audience will attach a specific meaning or emotion to it.

In his experiment, Kuleshov cut the shot of an actor with shots of three different subjects:  a girl in a coffin, a hot plate of soup, and a pretty woman lying in a couch. The footage of the actor was the same expressionless gaze. Yet the audience raved his performance, saying first he looked sad, then hungry, then lustful.

In a 1964 interview for the show Telescope, Alfred Hitchcock called this technique “pure cinematics – the assembly of film.” Sir Hitchcock says that if a close-up of a man smiling is cut with a shot of a woman playing with a baby, the man is portrayed as “kindly” and “sympathetic.” By the same token, if the same shot of the smiling man is cut with a girl in a bikini, the man is portrayed as “dirty.”


Both these examples further illustrate the power of editors as storytellers. The data gathered with the Kuleshove Experiment were heavily used by Russian filmmakers, especially in respect to the Soviet Montage. Eventually, this became commonplace.


The findings from the Kuleshov Effect have deeply affected how filmmakers shoot and edit their movies. 

Conspiracy Theory edit

The conspiracy theory edit is our main assessment for post-production, the criteria for the assessment was as follows;

·         Create a 4-5 minute film.
·         Work in groups of 2 or individually
·         All images must be taken from archive footage found on the internet and stock footage.
·         The film must have an opinion. It must come from one side of the subject.
·         It must be considered to be a conspiracy theory.
·         You must choose a subject and create a narrative from the story.
·         You must convince the audience it is true.

The first thing I had to do was to look up all the different possible conspiracy theories there were. Some of the possibilities were enhances crop that drop IQ's, the government oppressing alternative energy for cars and secret messages in music that tell the public how to live their lives. After researching all of the options I choose the government oppressing alternative energy. Once I had decided this I went onto many different websites to find evidence to support my conspiracy


Some of the websites I used;

  • http://jimstonefreelance.com/slapintheface.html
  • http://oilinhaiti.blogspot.co.uk/2014/07/haitian-natural-resources-oil-in-haiti.html
  • http://www.alternet.org/5-todays-wackiest-consumer-conspiracy-theories-debunked

I found that it was useful not only to find websites supporting my conspiracy, but also debunking it. This gave me and idea to expand and change my conspiracy into something else. I choose to have a conspiracy that the government and oil companies are working together. Once I had change to my new conspiracy I then had to find clips that I could use in my final edit. Here are just some of the clips I found;


After finding all these clips and more I started my rough edit in class. This mainly consisted of putting all the clips I found in no order and I quickly found I needed an editing style for the film. After researching how I could edit this assessment and finding suitable music I found a Charlie Chaplin speech from the great dictator with Hans Zimmer's Time from the movie Interception over the top and it was very moving and could fit well into my edit, especially what he was saying. 


Now that I had the speech and the music I decided to go for a motivational edit, showing the facts and then showing people trying to fight back as the music built up. Also the ending to the music had a sad fell so I thought I could show the effects of oil use to get the sympathy vote. After all this was decided my first edit in my opinion was good, I could see the project coming together. I shoed it to Andy and he helped me by giving feedback, which in summary was make it shorter and tidy up the cuts. 

My final edit is as follows; https://www.youtube.com/watch?v=XDi_qluREXU

Overall I am very happy with the final project, especially with the knowledge that this is one of the very first edits I have ever done. I fell like to packing was good in the majority of the film and the music and speech added a lot to it. Some parts which I would change would be just passed half way through I feel it slows down, and possibly this part could have been taken out. However like I said overall I am happy with what I have created and I can't wait to do something like this again.