Friday, 18 March 2016

Production Assessment 2 - Making a cocktail

After getting feedback from my assessment 1, we were then given our criteria for assessment 2. This again I had to film a process so I had to decide what I wanted to film. Seeing as recently I had been learning some simple cocktails I thought it would be perfect to film this. The process is easy to film, if I was able to get someone to help me and act in it.


After deciding what I want to film then proceeded to research possible cocktails I could film. As one of the most well-known aspects of cocktails is the shaker I wanted to have a cocktail. That used a shaker and from my research I chose a lemon drop martini. After deciding what cocktail to make I then had to create a shot list for the clip.  


Once I had filmed the process I then had to edit it. Even though we didn’t have to incorporate sound I still wanted to, so I had to find suitable music that would fit the film. As it was a rather short film it didn’t take me too long as I trimmed up my rough edit. Overall I was very happy with the final project I produced and believe it to be a high standard of my work. 

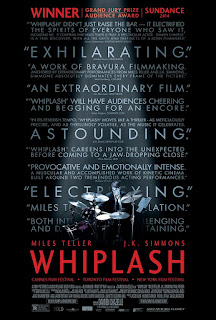
Whiplash

Fortunately it just so happened I have been trying to learn the drums recently and noticed a new film called ‘Whiplash’. Within the first 2 minutes I was blown away with the editing and cinematography of the film.

The plot of the film is a young and talented drummer attending a prestigious music academy finds himself under the wing of the most respected professor at the school, one who does not hold back on abuse towards his students. The two form an odd relationship as the student wants to achieve greatness, and the professor pushes him. - Written by andrewhodkinson.

I found out after that the film won an Oscar for Best Achievement in Film Editing. I wasn’t surprised as everything about what I had learnt in post-production, the film did really well. The pace of the film is exactly my idea of great pace and the film drew me in the whole time.


One of my favorite parts of the film is were Andrew (the main character) is practicing by himself. Before he starts he gets ha large jug of ice water and stets it to the side of him. As he is playing you see slowly his hands become bloody and he uses the jug to dip his hand in. You really get the sense of determination and struggle that he is facing and you become immersed in the fast paced but slow-motion scene.


Overall I would 100% recommend watching the film and really look at the editing style and how it complements the cinematic style of the whole film. 

Production Assessment 1 - Making a cup of tea

For the production module we were set an assessment that we had to film a process. It had to be less than 90 seconds and it had to make sense.  The main point for this assessment was to practice our composition in our shots, but we were also marked on our editing as the clip had to run with a good pace. 

My assessment 1 ttps://www.youtube.com/watch?v=32wJpJNqto8


Notes taken from the lecture are as follows;

Making a cup of tea

Making a montage is all about the close ins – think action and re-action!

What props are needed?

Mug, tea bag, milk, spoon, bin, table, kettle, person to make the tea.

Film the following from an observational POV. Therefore, watching the actor collect the props from their set locations and performing the process.

Establish space and location – what space do you have?     Suggest the process should take place on a table in the middle of the room to allow the camera to be positioned.  Allows more room around the subject so you can shoot from front, back, sides, angular shots. 

  1. Pick up kettle, carry it to sink and fill it up with water.
  2. Place it back on its base and turn it on
  3. Get a cup from the cupboard and put it on the table.
  4. Collect a tea bag from the pot.
  5. Put bag in cup
  6. Get milk from fridge . Do not pour any in yet.
  7. Get a spoon from the drawer
  8. Pick up sugar and position it close to the mug. 
  9. When the kettle has boiled pour the water into the cup.
  10. Put kettle down
  11. Stir the tea bag in the cup
  12. Let it brew. Watch the steam and the water swirling around
  13. Remove the tea bag and put it in the bin.
  14. Pour in milk
  15. Add sugar
  16. Stir
  17. Put Milk away
  18. Finished!


Overall my experience in filming and editing the assessment was good. Due to the fact I was by myself I found it hard to set up shots as I couldn’t see what the shot looked like. In terms of editing I really enjoyed it, also to note we didn’t have to focus on sound. I really worked on pace of the edit, but like I mentioned before I wasn’t always happy with the shot I had taken. As I had learnt I first did a rough edit to get an idea of how long the film will be and how it would run.  For the next assessment I will work on lighting, getting an friend to act and cutting down the clip. 

Audio Effects in Avid

In this week’s tutorial we learnt about adding audio effects to edits. We were first told to download video and audio clips from blackboard. The video was a clip from the film Delicatessen, which I had never seen before. 

With the sound effects and video we were told that by the end we had to create a clip that has sound and makes sense. The first thing I did was watch the clip in full. In doing so it was pointed out that a part of the clip, the camera goes through a small pipe. This meaning we would have to add a reverb effect to any sounds that were happening.  From the notes I have taken the instruction to use the audio mix was as follows;


Adjust audio in bin
  • Right click in bin > apply gain > ‘type value for adjustment’


Using the Audio Mixer
  1. If you select Window > workspace > Audio editing, the audio mixer will be brought up as standard but you can also choose the audio mixer from the tools menu.
  2. Selecting‘s’ – solo or ‘m’ – mute, in the audio mixer will also correlate this to the timeline.
  3. You can select the number of tracks you are viewing and the ‘groups of 4’ that you want to work on.
  4. Select and drag left or right to pan (if you try to move cursor around the wheel this won’t work)
  5. Join tracks together to adjust them all at the same time with the ‘group’ button


What makes a good action scene

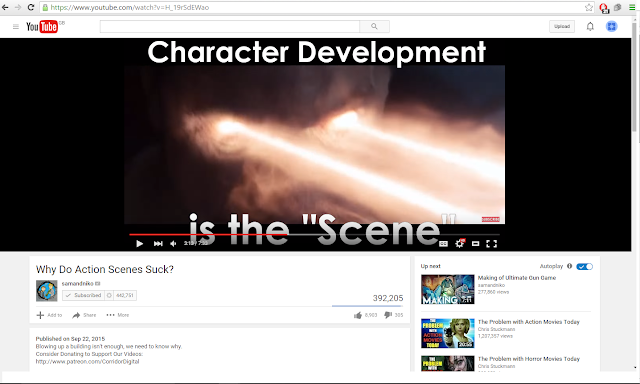
After looking at the other Low Budget tips video that the YouTube channel samandniko put out I subscribed to them in the hope that they would put out more similar helpful tips. Fortunately they did and this one talks about what makes a good action scene.


 Why do action scenes suck? - By samandniko

The video talks about different examples of action scenes that work and ones that don't and most importantly explains why they do or don't work. The main point I will take from the video is that good action sequences are there for a reason. the character in them have to be built up first so that the audience feel something for them whether it be anger towards them or they like them and want them to live. Also you need to show the full action, and possibly reaction in the same shot. Quick short cuts are used because they are cheap and easy to do, but it is better if you show wide shots of the whole sequence coming together.


Overall I will remember the advice given to me in this video if I ever do an action sequence in the future, this could be if I’m producing or editing. If I was editing a fight sequence I would try to add longer shots that showed the audience what is happening. 

Juxtaposition

Today in the lecture we learnt about Juxtaposition. The definition of Juxtaposition is;

‘In a film, the contiguous positioning of either two images, characters, objects, or two scenes in sequence, in order to compare and contrast them, or establish a relationship between them; see also sequence, symmetry, and composition.’

From what was discussed in class and what I have seen on films and T.V. shows, the use of juxtaposition is quite heavy and very impactful. Some good examples of juxtaposition are;

The Baptism Scene from ‘The Godfatherhttps://www.youtube.com/watch?v=EfbYp9oaIT8


A very similar scene in ‘Breaking Bad’ https://www.youtube.com/watch?v=NYcOl33-mI0


Both of the clips above have a very strong use of sound.  For example in ‘The Godfather’ as the action build up so does the organ in the background. In Breaking Bad the music adds adds to the juxtaposition as it is happy uplifting music and the pictures show are of brutal prison murders.

Lev Kuleshov, a Soviet filmmaker, was among the first to dissect the effects of juxtaposition. Through his experiments and research, Kuleshov discovered that depending on how shots are assembled the audience will attach a specific meaning or emotion to it.

In his experiment, Kuleshov cut the shot of an actor with shots of three different subjects:  a girl in a coffin, a hot plate of soup, and a pretty woman lying in a couch. The footage of the actor was the same expressionless gaze. Yet the audience raved his performance, saying first he looked sad, then hungry, then lustful.

In a 1964 interview for the show Telescope, Alfred Hitchcock called this technique “pure cinematics – the assembly of film.” Sir Hitchcock says that if a close-up of a man smiling is cut with a shot of a woman playing with a baby, the man is portrayed as “kindly” and “sympathetic.” By the same token, if the same shot of the smiling man is cut with a girl in a bikini, the man is portrayed as “dirty.”


Both these examples further illustrate the power of editors as storytellers. The data gathered with the Kuleshove Experiment were heavily used by Russian filmmakers, especially in respect to the Soviet Montage. Eventually, this became commonplace.


The findings from the Kuleshov Effect have deeply affected how filmmakers shoot and edit their movies. 

Conspiracy Theory edit

The conspiracy theory edit is our main assessment for post-production, the criteria for the assessment was as follows;

·         Create a 4-5 minute film.
·         Work in groups of 2 or individually
·         All images must be taken from archive footage found on the internet and stock footage.
·         The film must have an opinion. It must come from one side of the subject.
·         It must be considered to be a conspiracy theory.
·         You must choose a subject and create a narrative from the story.
·         You must convince the audience it is true.

The first thing I had to do was to look up all the different possible conspiracy theories there were. Some of the possibilities were enhances crop that drop IQ's, the government oppressing alternative energy for cars and secret messages in music that tell the public how to live their lives. After researching all of the options I choose the government oppressing alternative energy. Once I had decided this I went onto many different websites to find evidence to support my conspiracy


Some of the websites I used;

  • http://jimstonefreelance.com/slapintheface.html
  • http://oilinhaiti.blogspot.co.uk/2014/07/haitian-natural-resources-oil-in-haiti.html
  • http://www.alternet.org/5-todays-wackiest-consumer-conspiracy-theories-debunked

I found that it was useful not only to find websites supporting my conspiracy, but also debunking it. This gave me and idea to expand and change my conspiracy into something else. I choose to have a conspiracy that the government and oil companies are working together. Once I had change to my new conspiracy I then had to find clips that I could use in my final edit. Here are just some of the clips I found;


After finding all these clips and more I started my rough edit in class. This mainly consisted of putting all the clips I found in no order and I quickly found I needed an editing style for the film. After researching how I could edit this assessment and finding suitable music I found a Charlie Chaplin speech from the great dictator with Hans Zimmer's Time from the movie Interception over the top and it was very moving and could fit well into my edit, especially what he was saying. 


Now that I had the speech and the music I decided to go for a motivational edit, showing the facts and then showing people trying to fight back as the music built up. Also the ending to the music had a sad fell so I thought I could show the effects of oil use to get the sympathy vote. After all this was decided my first edit in my opinion was good, I could see the project coming together. I shoed it to Andy and he helped me by giving feedback, which in summary was make it shorter and tidy up the cuts. 

My final edit is as follows; https://www.youtube.com/watch?v=XDi_qluREXU

Overall I am very happy with the final project, especially with the knowledge that this is one of the very first edits I have ever done. I fell like to packing was good in the majority of the film and the music and speech added a lot to it. Some parts which I would change would be just passed half way through I feel it slows down, and possibly this part could have been taken out. However like I said overall I am happy with what I have created and I can't wait to do something like this again. 

My experience of using Multi-cam in Avid so far

After using the materials online and provided on blackboard by Anne and Mel I have finally had a chance to have a go at using multi cam editing in Avid. I was able to get interview footage that would be used as a voice over for the 'Hot Glass' project we have worked on. Following the instructions I found I difficult to use. This was mainly in the setting up and syncing footage to get it right which I found hard, however I also found the splicing in to be hard also. I found it finicky, but it has to be said I was learning off written instructions and this isn't the best way I could have learnt it. 


Overall I think with time and practice I could get used to using multi cam editing on Avid. The use of multi cam could also be helpful with the up coming assessment of Gaucho. This means i will have to practice it if i want to to take full advantage of the software.

Thursday, 17 March 2016

Multi-cam Editing in Avid

After unfortunately missing the tutorial on using multi cam in Avid i went online to find a helpful tutorial on how to do it. Here is some of the information gained from that website;

Link:- http://www.premiumbeat.com/blog/setting-up-for-multi-camera-editing-in-avid-media-composer-part-1-of-2/

Setting up your Multi-cam Editing Environment

Once you’ve grouped each set of takes and organized them appropriately, it’s time to set  yourself up for MultiCam editing.
To set up MultiCam editing:
  1. Create a new bin called “Group Clip Sequences.”
  2. Load your group clip into the Source Monitor.  Mark an IN and an OUT to define the clip (or section of the clip that you want to edit).
  3. Splice the group clip into the timeline.
  4. Name the new sequence.  Place it into the Group Clip Sequences bin.
  5. Activate MultiCamera mode by choosing Special > MultiCamera Mode or press Command+Shift+M (Mac) orCtrl+Shift+M (Windows).
  6. By default, the monitor will display four monitors, called a Quad Split.  (If you don’t have four shots, it will display as many as you have.)
  • If you need to view more than four shots (Avid can display a maximum of nine at a time), you may change this via the Command Palette.  You may map the Nine-Split button (Command Palette > MCam tab) to your keyboard.
  • To switch to an additional bank of four or nine camera angles, map the Swap Cam Bank button (Command Palette > MCam tab) to your keyboard.  (You can swap banks on-the-fly while playing in Quad Split mode, but not in Nine-Split mode.)
  • To edit in MultiCam mode:

    1. Make sure you have the appropriate MCam keys mapped to your keyboard.  By default, the MCam keys are mapped to F9-F12 and Shift F9-Shift F12.  If you’re using a traditional keyboard, this will work fine, but if you’re on a laptop, you may want to remap these, as F-keys can behave differently on some laptops.  To remap your MCam keys, just open the Command Palette, and open your customizable Keyboard (Settings).  Then, map M1, M2, M3… etc. from the MCam tab via Button-to-Button Reassignment to your keyboard.
    2. Play the sequence (which you’ve already cut into the timeline, as shown in Part 1 of this tutorial series).  A green line will underline the active monitor (which means this is the shot that will be edited into the timeline).
    3. Press the MCam buttons to switch the camera angle that you wanted edited into the timeline, or just click on the desired shot in the MultiCam monitor (formerly the Source Monitor). A cut is made starting at the position indicator, and each time you press an MCam button or click in the MCam monitor, another edit will be created.
    4. The sequence updates immediately in the Quad Split display (in the MultiCam Monitor), as well as the playout image in the Record monitor during playback.  For this reason, you usually make your cuts on-the-fly as you play through the sequence (the “instinctual” step, as described above).  Note: the Timeline doesn’t update with  until you stop playback.
    5. After you’ve edited the sequence, you should go through and fine-tune your sequence.  Usually, dual-roller trims are key (since you can change the transition point without breaking sync or interfering with the audio track).  Slipping and sliding are also very useful during this stage.
    6. During the fine-tuning process, you can change any segment in the sequence to a different camera angle.  There are a couple of ways to do this:
      •   Right-click on a segment and switch the camera angle by changing the check-marked clip.

      •   Map Next in Group and Previous in Group (from the Command Palette > MCam tab) to your keyboard.  Park on a shot and use these buttons to shuttle through the various MultiCam shots.  (Make sure the Record Monitor is active during this process.)
    7. If the number of camera angles is more than the total number of visible panes, you can press the Swap Cam Bank button to display the next bank of cameras.
    Once you’ve gone through the sequence a couple of times—usually at least one pass to tweak your edit points using Dual-Roller Trim and Slip/Slide Trims, and at least one pass to adjust any of your shot choices—you can finalize your shot timing, and start to work on the finer details of your sequence.
    As you can see, once you front-load the work in getting set up for multi-cam editing, the actual process of laying down the shots is very simple, instinctual, and fun!

What i think about Avid

The editing of feature films is a small niche of the overall market for editing software, yet companies continue to highlight features edited with their software as a form of aspirational marketing to attract new users. Avid Technology has had plenty of competition since the start of the company, but the majority of mainstream feature films are still edited using Avid Media Composer software. Lightworks and Final Cut Pro “legacy” have their champions (soon to be joined by FCP X and Premiere Pro CC), but Media Composer has held the lead as the preferred software for feature film editors.

My opinion on Avid so far is i find it easy to use once i have been shown properly. Before coming to University i have never used editing software myself so i felt nervousness about using it, however i felt like i have picked up the software rather quickly and have gotten used to it. this could be due to the fact i have never used any editing software before so i have nothing to compare it to, but in terms of overall how good i think it is, i fell it is easy to use.


One think we were thought was that editing speed is gained through familiarity and muscle memory. When you hire a top-notch feature editor, you aren’t hiring them for their software prowess. Instead, you are hiring them for their mind, ideas and creativity. Most know how they need to manipulate the software tools so well, that thinking about what to do in the interface just disappears.

Moving Files in Avid

To fully understand the software Avid i will have to learn how to do simple tasks such as moving files, both on the Mac and the PC. When transferring projects in Avid from one computer to another, it is very important that you know where to put the files, as Avid has a specific way of linking footage and projects. The notes i took in class were;

PC

  1. Select Computer
  2. For Avid Mediafiles………
  3. Relevant Root drive (C: or D: normally but in F5 use C:) > ‘Drag whole Avid MediaFiles folder here’
  4. But if the Avid MediaFiles folder exists already -
  5. Avid Mediafiles > MXF > Put relevant folder of footage here’
  6. For Project Folders……….
  7. Relevant Root drive (C: or D: normally but in F5 use C:) > Users > Public > Public Documents > Shared Avid Projects > Put relevant project folder here’
Mac

  1. Select finder
  2. For Avid Mediafiles………..
  3. Select Macintosh HD > ‘Drag whole Avid MediaFiles folder here’
  4. But if the Avid MediaFiles folder exists already -
  5. Avid Mediafiles > MXF > Put relevant folder of footage here’
  6. For Project Folders………….
  7. Select Macintosh HD > Users > Shared >AvidMediaComposer > Shared Avid Projects > ‘Put relevant project folder here’
A simple set of instructions like this will be easy to learn over time thus making Avid an easier piece of software to use. 

Low Budget tips

As a student film maker any tips to improve my skills would be appreciated. That’s why it is important to look at any helpful videos that will show an insight into the industry. Knowing this I looked for any videos that would help me and came across a great channel called samandniko. They have 440,000 subscribers and over 37,000,000 in this channel. There description states:

"Making of"s or "Behind the Scene’s & "Before and after’s to our main channel videos on Corridor Digital. Then some oddball videos not quite suited for our main channel.


Meaning they have an even bigger channel with more subscribers. This means that any tips they have for film making should be taken into consideration. This being said they made a low budget tips video which is great for a student film maker like me.

Low Budget Tips - By samandniko


Overall the tips given in this video will help me in the my current situation as a student. Personal i think all film students should watch this as it is very useful and can help in many different ways.


Visual Effects in Avid

By adding visual effect to edits allows the it to seem to have a higher production value, this being said it is important to learn how to add effects into edits on Avid. We first learnt how to add basic effects to our edits, noting some of the instructions learnt;
To apply an effect in Avid is simply a case of dragging the effect and dropping it on to the desired clip. Most effects will change the entirety of the clip whereas transitional effects (dissolves, wipes etc.) need to be applied to the areas at which the clips overlap. Video effects for Avid can be found in the project window.

To remove any effect, place your timeline over the clip or area where the effect is and select the remove button from the timeline.

We practiced these effects on clips from The Nightmare before Christmas which is a stop motion film. At first i found it hard to direct myself around the software as i felt there was too many different way to do it and i was being told all of them in one go. But after getting a hand on the best way to do it i felt confident in my ability to add basic effects into the edit. then we i learned how to;

Experiment with some of the transition effects found under the blend, box wipe, edge wipe, matrix wipe, peel, push, sawtooth wipe etc. option menus. 
Once the effect has been added, open up the effect editor to alter the settings. 
To do this, place your timeline indicator over the clip or area with the effect on. Then select the effect editor icon from the timeline.

Finally i learnt how to create clips of different speeds and also reverse clips by selecting a segment of my source clip using the hot keys I and O then going to Tools and Motion Effect Editor.


Colour Grading in Avid


Avid has long been the overwhelming Non-Linear Editing system of choice for major feature films and prime time scripted TV shows. One of the many strengths of Avid is the method of applying colour correction. In the last few years, colour correction has come to be used directly by editors instead of separately by colourists. It’s a process that can make the most obvious difference to my projects, so it’s a very good thing to know how to do.

Most other NLEs either add color correction as an effect or a completely separate process that requires leaving the NLE then round tripping back to the editor. In Avid, colour correction is a mode, which allows you quick access to its features but keeps them out of the way while you're editing. It’s really the best of both worlds.


Generally, you want to do colour correction in context of the shots around it. That means colour correction should really be a process done near the end of the edit. But when we think the final edit is done, there’s always something else that gets tweaked.

In systems that require roundtripping, this takes a lot of time, requires specialized workflows, and rarely works properly or conveniently. In Avid, though, you're a click of a button from updating the edit or the colour correction.

In Avid, you can do colour correction using the same input tools that you use for editing, such as a mouse or a trackball or tablet.

Wednesday, 16 March 2016

Pacing

Today we were tough about the importance of pacing in editing. Giving an edit pace can add a lot to the fell and the narrative of film. It can create tension in clips and tell the audience what is going to happen in the clip before it even happens. The thing about editing is that when it's done right, almost no one notices it, and when it's really noticeable, it's nearly unbearable or just disjointed. To understand if a film is good you should study each film like a piece of music.

It's nearly impossible not to notice a song that goes off rhythm or changes tempo too quickly because our ears are naturally inclined to react to those changes. But our eyes aren't as well trained to transmit that information. Given the onslaught of abrupt images, our eyes have been conditioned to believe a shot per second is a standard tempo. So I find more and more in film reviews, people will confuse a slower pace to a bad one. But it's not.

A perfect example of this would be Goodfellas. I'll always remember Martin Scorsese saying he had people requesting he make a film like the last 15 minutes of Goodfellas because of its frantic energy. But those 15 minutes were a tempo that was built up to by the preceding 120 minutes, which explored various other tempos.

https://www.youtube.com/watch?v=I90ZluYvHic

On the other hand, a film like Barry Lyndon or 2001 is criticized for its excruciating pace. Yet, they both have a very deliberate and steady pace. No editor could criticize those films for being badly paced because they're not. They work in slower movements like perhaps Chopin's Adagio. One film explores a pace that would be customary in 19th century England and the other reflects a pace that might be found in the boundlessness of the galaxy.

https://www.youtube.com/watch?v=9lzSoKOs1fc

The Martian

The Martian is the story of a team of astronauts who are midway through their mission on Mars when, during a horrific storm on the Red Plant, they are forced to abandon the mission they had been tasked with. During the chaotic flee back to the rocket, their resident botanist, Mark Watney, is struck by debris and presumed dead by the rest of the crew. The crew make the difficult call to start on their return journey to earth, leaving Watney, who was only unconscious, behind and who subsequently wake up alone with no sign of his crewmates.


The film is propelled forwards by Watney's isolated attempts to survive, as any return rescue mission is likely to take years to arrive, assuming that NASA even find out that he's still alive. Meanwhile NASA, who soon realise their horrific mistake, are left to measure out the worth of one person's life against their own reputations in a PR nightmare, tremendous expense and the risk to the lives of others that any rescue mission would mean. All of this is set to the ticking clock of starvation on the barren, vast world that Watney now inhabits

For most of the movie it is one man speaking to the camera, through the pretext of Watney leaving log recordings in case a rescue mission does not arrive in time to save him.  The film allows Damon, the actor, to directly engage with the audience on his state of mind and progress.  By allowing its lead character to address viewers in such an immediate fashion, the film pretty much gives all control to Matt Damon who plays the role of Watney.

In terms of post-production, the film has a lot of Computer Generated Images (CGI). As the film is set on Mars it is interesting to see the colour correction and green screen they implemented into the film as seen in some of the pictures below. 


Watching this reminded of a youtube video called ‘Why CG Sucks (except it doesn’t)’

The video talks about the use of CGI in movies and basically says that good CGI is when you don’t even notice it and it is more about the using the effects to help tell your story than using then for the effect itself. The Martian clearly uses CGL in this way to enable the story to be told and for it to appear realistic, the fact that it uses CGI to create a believable atmosphere and context for the story to unfold.